How to Set Up Your Smart Bulb
Advancements in technology have come a long way, even just in the last handful of years. I remember when Netflix mailed physical copies of movies to its customers, two at a time, and now Americans stream Netflix on their phones.
Smart devices have completely changed the way that we live, from entertainment, food service, and even our lighting. With the invention of the Smart Bulb, we’re able to control almost every aspect of what our lights can do. The only limitation is the user’s knowledge of their device. Fortunately, that’s where this blog comes in.
Table of Contents
Before We Begin...
Setting up a Smart Bulb can be a hassle, even with a user manual. Steps can feel overly technical or convoluted, so today, I’m going to break down each step in the most comprehensive way possible. To start, let’s make sure that you have the tools you’ll need to be successful.
Step 1: Download The Smart Life App

Download and install the Smart Life App through the iOS App store or Google Play Store, depending on the smart phone you own. Search for “Smart Life - Smart Living” and you should see a little blue icon with a white house. This is the mother of all smart device apps so if you don’t already have it go ahead and download it.
Sometimes, the specific brand of smart bulb that you purchase may have you download their company's smart app instead, but the steps below should be mostly identical. For example, Sunco’s Smart Bulb Series user guide may suggest using Sunco’s Mobile application, however, the setup and interface are exactly the same as Smart Life’s so you can follow along that way as well.
Step 2: Create an Account

Next, you’ll want to register for an account using your mobile phone number or your email address, so that you can receive a verification code. Once you get that, you’ll press “next”, where it will then prompt you to enter the verification code and press “next” again. Create a password for your account and, you guessed it, press “next” to move on.
Some people ask if they have to create an account because they’re worried about getting too many emails or unwanted text messages. I’ll be honest, it’s helpful to have an account so that you can easily pair more devices without having to reconnect to the app, but you can “sign in as guest” when prompted and continue that way as well.
Step 3: Connect to Wi-Fi

Before we go any further, check your bulb’s router compatibility. Some Smart bulbs, such as Sunco’s Smart Series, are only compatible with 2.4GHz routers, meaning they will not work with 5GHz Wi-Fi networks or dual routers. While a dual router does offer a 2.4GHz network, your bulb will be trying to swap between networks to get the best connection, which will ultimately lead to an incompatibility issue.
That said, make sure that your 2,4GHz Wi-Fi network is connected, and turn on Bluetooth and Location Services. Then you should screw your Smart bulb into its fixture and ensure that the light turns on with the switch. You can’t connect a dead bulb!
Open the Smart Life App and tap “Add a Device” or the “+” in the top right corner of the screen.
Under the “Add Manually,” tab select “Lighting” and then “Light Source (Wi-Fi).” Select 2.4 GHz Wi-Fi Network and enter your Wi-Fi password.
Step 4: Reset the Bulb (If the light is already blinking rapidly, skip this step)

This part can seem tricky, but I promise it’s not. First things first, you can only pair one bulb at a time. Keep that in mind to make this process flow more smoothly.
What you want to do is turn the power on and then off again quickly, between 6-7 times. So like, On-Off-On-Off-On (etc). You’ll know you’ve done this right when you stop and the bulb begins blinking, indicating that it is ready to pair.
Your bulb should start connecting and will change from flashing to steady as the app loads. At 100% the bulb has configured successfully. Congratulations! You successfully connected your smart bulb, and you can now rename the bulb. You can also share it with family members registered to the Smart Life App using the mobile number they registered with so that they can control the bulb from their phones as well.
Troubleshooting for Step 4:
If you find yourself attempting to pair your bulbs in the blinking step and this is yielding poor results, try these tips:
- Change the paring mode from EZ Mode to AP Mode in the top right corner’s drop-down menu.
- Once the light is blinking rapidly, continue to turn it on and off 3-7 times until it starts to blink slowly.
- Check the “Confirm the Light is blinking slowly” prompt, then tap “Go to Connect” and follow the prompts on the app that I also detailed above in Step 4.
- Go to the Wi-Fi settings on your device and connect to the bulb’s hotspot (may appear as Smart Life- or SL- followed by a series of numbers/letters).
- NOTE: You may see a “no internet available” message from your device; this is normal in the pairing process, so don’t panic.
Step 5: Controlling your Bulb

In the Smart Life App, or whichever application you connected these bulbs to, click on the bulb you want to control to change the color, adjust brightness, choose a scene, or set a schedule. Alternatively, you can create a group of bulbs to change settings for more than one bulb at a time.
Select the bulb and click the settings in the top right corner to check the network status or add it to a group of bulbs to control together. You can do this by following these simple steps.
- Click on the bulb you would like to add to a group.
- Select the three dots in the top right of your screen.
- Select Create Group from the drop down.
- Select the smart bulbs you would like to be part of a group.
- Click Save.
- Select a name for the group.

What Can You Control with Smart Bulbs?
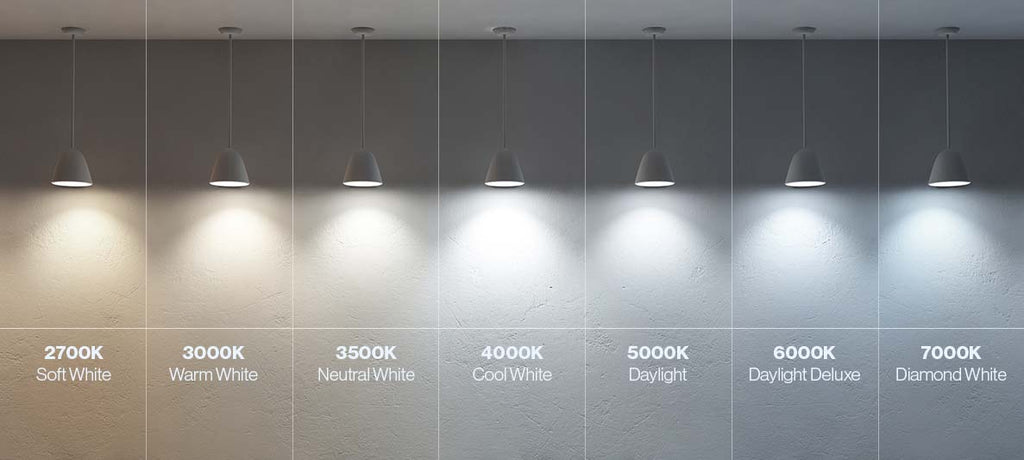
Smart Technology, especially when it comes to lighting, is all about versatility. There are a ton of features that lights like Sunco’s BR30 LED Smart Bulb let you control right from the app. These include color temperature, RGB color with 16+ million options, brightness schedules based on your preferences and needs, and finally, music sync to make your light bulb change color to the beat of music.
Smart Home Set up for Voice Control with Amazon Alexa (Or Echo)
One of my favorite benefits of smart lights is their ability to connect to smart home devices. I connected my smart bulbs to my Alexa, and it is so convenient when I’m lying in bed to say “Alexa, lights off!” without having to get up from my cozy spot.
To connect your smart bulb, open your Amazon Alexa app and choose “Skills” in the options bar, and then search “Smart Life” in the input box. Select “Smart Life” in the search results, and then click “Enable to Use.”
This is where it comes in handy to have registered your account because it will ask you to input the username and password that you used previously to register. After you do that, you can control the bulb by saying “Alexa, (Or Echo) discover my devices.” Your smart home system will start to find the bulbs that you added in the Smart life APP. It could take about 20 seconds, but once it’s done, you can control the bulbs by vocal instructions.
Smart Home Set up for Voice Control with Google Home
You can set up voice commands for your smart bulbs through a Google Home device as well, if that’s more your style. Versatility, remember? Simply open your Google Home App and tap “Home Control” in the menu on the home page. You can then tap “+.” and search for “Smart Life” from the list. In the new window, select your Smart Life account’s region, type your Smart Life account and password, then tap “Link Now.”
After you assign rooms for devices, your devices will be listed in the Home Control page. Now you can control your smart devices through Google Home. Take bedroom light as an example. The supported voice commands are as below: “Ok Google, turn on/off bedroom light.” “Ok Google, set bedroom light to 50 percent.” “Ok Google, brighten bedroom light.” “Ok Google, dim bedroom light.” I think you get the point.

Voice Control Using the Smart Life App
Let’s say you don’t have a fancy smart home device, but you still want to use voice commands for your bulbs. You can use the Smart Life App directly to do essentially the same thing, without setting up an entire home system.
All you have to do is click on the microphone icon and control your bulb using your voice. You can change the name of each bulb or group of bulbs to make this easier for you. So, as an example, you would say “Turn on [bulb name]” or “Turn off [bulb name]”
Why You Should Invest in Smart Bulbs
These versatile little lights have become wildly popular over the last five years or so, as more and more people opt for voice activated or color changing bulbs. The convenience of control, directly from your phone (because who doesn’t have a smart phone nowadays?) is just one more thing we have at our disposal.
Smart lighting is all about options. Changing your hues and mood easily makes for an easy ambiance change at the tip of your fingers.
The versatility of smart bulbs goes beyond simple on/off functionality. By seamlessly integrating with a smart home system, these bulbs become integral components in creating distinct atmospheres for various rooms.
Smart technology allows you to sync your appliances to your mobile device so you can monitor your home while you're on the go, in case you're like me and sometimes forget to turn the lights off. Overall, smart technology is a worthy investment for anyone looking to upgrade their space.